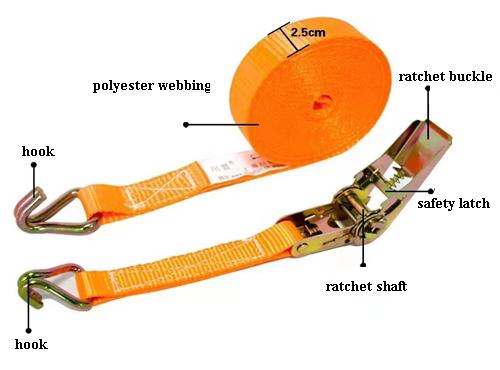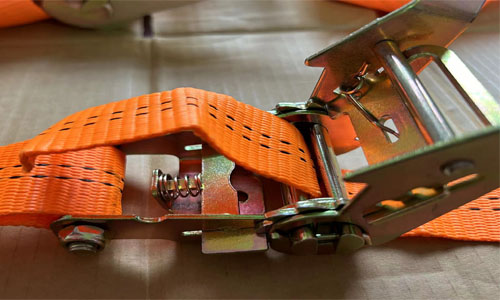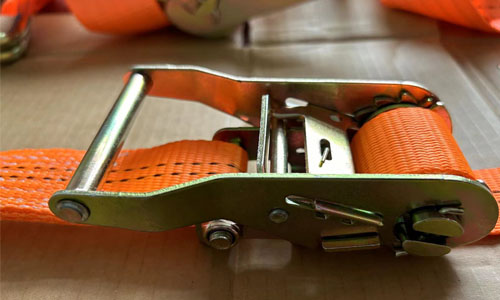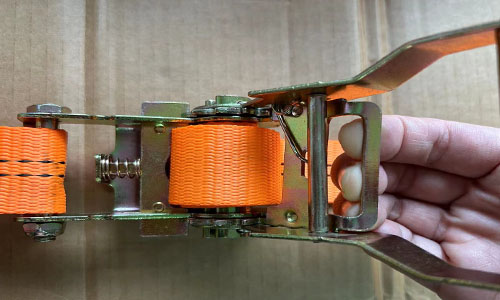
The ratchet tie down is composed of a ratchet buckle, webbing sling, and hooks. The ratchet buckle is crafted from high-strength and high-toughness steel plates, available in 1-inch, 1.5-inch, 2-inch, 3-inch, 4-inch, etc., primarily used for securing the webbing sling. The ratchet gear on the ratchet buckle, similar to the ratchet on a chain block, acts as a brake. Hooks come in various styles, including single-row hooks, double-row hooks, rotating hooks, etc. Similarly, they are welded from high-strength steel plates and are used to latch onto goods or the ends of a cargo truck. The straps are mostly made of polyester webbing, with widths ranging from 25mm to 100mm.

The breaking strength of the ratchet strap ranges from 300kg to 10000kg, and there are over 300 types of tensioners available in the market. Please choose the right capacity, length of sling, and hooks based on your environment.
The ratchet tie down, also known as tensioners, or lashing belts, are commonly used on cargo trucks to secure items. They are easy to operate, convenient, and unlikely to come loose, ensuring safety and reliability. If you are unfamiliar with its operation, please follow the steps below to protect goods from damage.
Step 1: Thread the straps

Attach the hook on secure points
First, ensure that the aluminum handle is punched up. The tensioner has two hooks, one long side and one short side; securely fasten them at the respective ends of the pallet or cargo truck.
Make the axle and the bottom plate at 90°
This is a little tip for you easy threading of the webbing.
From the back, insert the loose strap into the middle of the half-axle
Smooth out the webbing, thread it through the center of the semi-axis, avoiding excessive pulling, approximately 10cm or so.
Step 2: Tighten the ratchet buckle

Start to operate the handle up and down
Begin by holding the short strap with one hand and gripping the aluminum handle of the machine head with the other, pressing and releasing repeatedly. Typically, around 3 to 4 cycles should suffice.
Pull the trigger press down to lock the buckle
After tightening the webbing, close the ratchet buckle; at this point, the safety mechanism is engaged, ensuring a secure and firm hold without any loosening.
Step 3: Release the ratchet strap
Pull and release the trigger

Flatten the handle to a horizontal position

Release the webbing
Please use your strength to pull the strap out!
Step 4: Storage the ratchet strap
After using the tensioner, promptly clean any debris from the binding sling and store it away to prevent any impact on product performance.
When storing the tensioner, ensure it stays dry to prevent rusting of the machine head and mold growth on the webbing.
Store the tensioner away from heat sources to prevent aging.
Place it on a flat surface, away from sharp objects, to avoid scratches or damage.
From the above, you can know the ratchet strap clearly and operate it safely.
If you don’t know how to choose the right ratchet tie down, welcome to contact with us.

